> ## Documentation Index
> Fetch the complete documentation index at: https://daehan-base.mintlify.site/llms.txt
> Use this file to discover all available pages before exploring further.
# 설정
> React 애플리케이션에서 Base Account와 함께 Privy 설정하기
export const GithubRepoCard = ({title, githubUrl}) => {
return
;
};
원활한 사용자 인증과 지갑 관리를 위해 Base Account와 함께 Privy를 설정하는 방법을 알아보세요.
## 개요
[Privy](https://www.privy.io/)는 온체인 애플리케이션을 위한 사용자 인증 및 지갑 관리 솔루션을 제공합니다.
Base Account와 Privy를 통합하면 Base Account 사용자에 대한 접근을 유지하면서 모든 Privy 훅과 메서드를 사용할 수 있습니다.
### 달성할 내용
이 가이드를 마치면 다음을 할 수 있습니다:
* Base Account 지원으로 Privy 설정
* Base Account를 주요 인증 옵션으로 설정
* Privy의 React SDK에서 Base Account SDK에 접근
[Base Account Privy 템플릿](https://github.com/base/base-account-privy)으로 바로 시작할 수 있습니다.
## 설치
### 1. 새 Next.js 프로젝트 생성
```bash npm theme={null}
npx create-next-app@latest base-account-privy
cd base-account-privy
```
```bash yarn theme={null}
yarn create next-app base-account-privy
cd base-account-privy
```
### 2. Base Account SDK 버전 오버라이드
최신 버전의 Base Account SDK에 접근하려면 package.json 파일에서 Privy가 고정한 버전을 오버라이드해야 합니다.
다음 명령어로 오버라이드할 수 있습니다:
```bash npm theme={null}
npm pkg set overrides.@base-org/account="latest"
# 또는 package.json에 수동으로 추가:
# "overrides": { "@base-org/account": "latest" }
```
```bash pnpm theme={null}
# pnpm은 package.json에 수동으로 추가해야 합니다:
# "pnpm": { "overrides": { "@base-org/account": "latest" } }
```
```bash yarn theme={null}
# yarn은 resolutions를 사용합니다 - package.json에 수동으로 추가:
# "resolutions": { "@base-org/account": "latest" }
```
```bash bun theme={null}
# bun은 overrides를 지원합니다 - package.json에 수동으로 추가:
# "overrides": { "@base-org/account": "latest" }
```
특정 버전을 사용하려면 오버라이드에 버전을 추가하세요:
```bash npm theme={null}
npm pkg set overrides.@base-org/account="2.2.0"
# 또는 package.json에 수동으로 추가:
# "overrides": { "@base-org/account": "2.2.0" }
```
```bash pnpm theme={null}
# pnpm은 package.json에 수동으로 추가해야 합니다:
# "pnpm": { "overrides": { "@base-org/account": "2.2.0" } }
```
```bash yarn theme={null}
# yarn은 resolutions를 사용합니다 - package.json에 수동으로 추가:
# "resolutions": { "@base-org/account": "2.2.0" }
```
```bash bun theme={null}
# bun은 overrides를 지원합니다 - package.json에 수동으로 추가:
# "overrides": { "@base-org/account": "2.2.0" }
```
**새 프로젝트가 아닌 경우**
오버라이드가 적용되도록 `node_modules`와 `package-lock.json`을 삭제하고 새로 설치해야 합니다.
### 3. 의존성 설치
원하는 패키지 매니저로 의존성을 설치합니다:
```bash npm theme={null}
npm install @privy-io/react-auth @privy-io/chains @privy-io/wagmi-connector wagmi viem @base-org/account-ui react-toastify
```
```bash pnpm theme={null}
pnpm add @privy-io/react-auth @privy-io/chains @privy-io/wagmi-connector wagmi viem @base-org/account-ui react-toastify
```
```bash yarn theme={null}
yarn add @privy-io/react-auth @privy-io/chains @privy-io/wagmi-connector wagmi viem @base-org/account-ui react-toastify
```
```bash bun theme={null}
bun add @privy-io/react-auth @privy-io/chains @privy-io/wagmi-connector wagmi viem @base-org/account-ui react-toastify
```
## 설정
### 1. 환경 변수 설정
프로젝트 루트에 `.env.local` 파일을 생성합니다:
```bash theme={null}
NEXT_PUBLIC_PRIVY_APP_ID=your_privy_app_id
```
Privy App ID는 [Privy 대시보드](https://dashboard.privy.io/)에서 가져옵니다.
### 2. Privy 프로바이더 설정
Base Account를 기본 로그인 방법으로 하는 Privy 설정을 생성하고, `PrivyProvider`를 포함하도록 레이아웃을 업데이트합니다.
```tsx 프로바이더 생성 (app/providers.tsx) expandable theme={null}
"use client";
import { PrivyProvider } from "@privy-io/react-auth";
import { base } from "@privy-io/chains";
export default function Providers({ children }: { children: React.ReactNode }) {
return (
{children}
);
}
```
```tsx 레이아웃에 추가 (app/layout.tsx) expandable theme={null}
import type { Metadata } from "next";
import { Geist, Geist_Mono } from "next/font/google";
import "./globals.css";
import Providers from "./providers";
const geistSans = Geist({
variable: "--font-geist-sans",
subsets: ["latin"],
});
const geistMono = Geist_Mono({
variable: "--font-geist-mono",
subsets: ["latin"],
});
export const metadata: Metadata = {
title: "Privy Next 데모",
description: "create next app으로 생성됨",
};
export default function RootLayout({
children,
}: Readonly<{
children: React.ReactNode;
}>) {
return (
{children}
);
}
```
## 사용법
### 1. 앱 페이지 업데이트
인증 플로우를 표시하도록 `app/page.tsx` 파일을 업데이트합니다:
```tsx app/page.tsx expandable theme={null}
"use client";
import { usePrivy } from "@privy-io/react-auth";
import { ToastContainer } from "react-toastify";
function Home() {
const { ready, authenticated, logout, login } = usePrivy();
if (!ready) {
return
로딩 중...
;
}
return (
{authenticated ? (
) : (
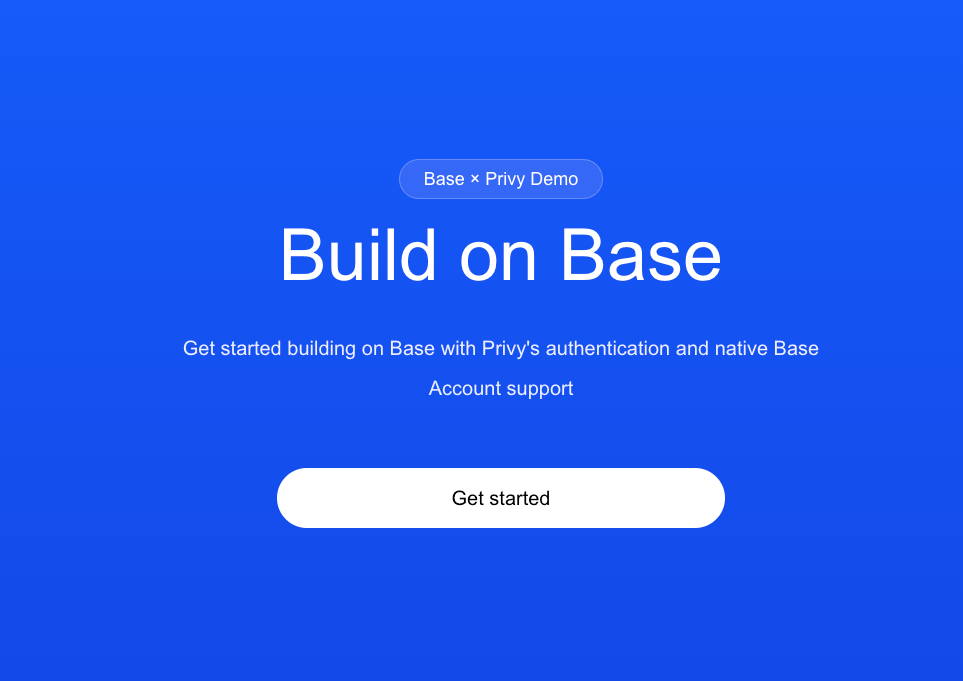
Base × Privy 데모
Base 위에서 구축
Privy의 인증과 네이티브 Base Account 지원으로 Base 위에서 구축을 시작하세요
)}
);
}
export default Home;
```
### 2. 로컬에서 프로젝트 실행
완료되었습니다! 이제 로컬에서 프로젝트를 실행할 수 있습니다:
```bash npm theme={null}
npm run dev
```
```bash pnpm theme={null}
pnpm dev
```
```bash yarn theme={null}
yarn dev
```
```bash bun theme={null}
bun dev
```
다음과 같은 페이지가 표시됩니다:
### 3. Base Account SDK 인스턴스 가져오기 (선택사항)
`useBaseAccount` 훅을 사용하여 Privy에서 Base Account SDK에 접근할 수 있습니다.
```tsx SDK 인스턴스 가져오기 theme={null}
import { useBaseAccountSdk } from '@privy-io/react-auth';
const { baseAccountSdk } = useBaseAccountSdk();
const provider = baseAccountSdk.getProvider();
const addresses = await provider.request({method: 'wallet_connect'});
```